Your cat finds comfort in staying up in high places. They want to rest far from the disturbance below them. So why not give them that from the very start? And what better way to do that than making a floating shelf for them. Don't know how to make one yourself? We've researched everything for you, from planning, buying the materials, and the actual process, so you can create one quickly.
You can make a floating shelf for your cat by following the steps in each of the following main processes below:
- Survey possible locations and draft a plan.
- Gather all the necessary materials.
- Create and install the actual cat shelf.
A floating cat shelf is a reliable and efficient alternative for space-hungry cat trees. With cat shelves, you both get to maximize the area and still give your home interior a sophisticated design accent, all the while providing your cat a place to rest. Continue reading the rest of the article for today to learn the detailed instructions in making a floating cat shelf.

Putting A Cat Shelf On The Wall
The processes we have above are general instructions. In this section, we will delve into the step-by-step instruction under each procedure. We have a lot to cover, so let us get into them straight away.
1. Survey possible locations and draft a plan
Before diving into any actual work, you first have to answer the following questions:
- What is the favorite lounging area of your cat?
- Where in your house can you use as an alternative to your cat’s favorite spot?
- How high would the cat shelf be?
Why do you have to know the answer to these questions? Knowing the favorite spot of your cat has to do with familiarity. When your cat is already familiar with the floating cat shelf location, your cat will have little difficulty adjusting to the new resting place.
But if that place leaves little to no room for a mini-renovation because of safety reasons, choose another area in your home your cat spends considerable time in. Your cat may have already considered these spaces its territory or personal space.
After finishing your mini-survey, sketch up the placement of floating cat shelves. This outline will serve as your blueprint for the cat perch architecture. Ensure that the height and distance of each board conform to the mobility and overall health of your cat.
In other words, the distance between shelves should be deep and high enough that it encourages physical labor while considering its weight and size, especially when it has been showing signs of obesity. This way, you can avoid accidents from happening.
This is the reason why most cat shelves have a diagonal design instead of a vertical one. Although it still makes your cat jump from one board to another, it does not pose much danger yet still fosters enough physical activity to keep her healthy and active.
2. Gather all the necessary materials
The next thing you should do is complete all the items necessary to build the floating cat shelf. We've listed the items below. You can find in your local home improvement store and pet store:
- A 1/2-inch thick wooden board or a pre-made cat shelf
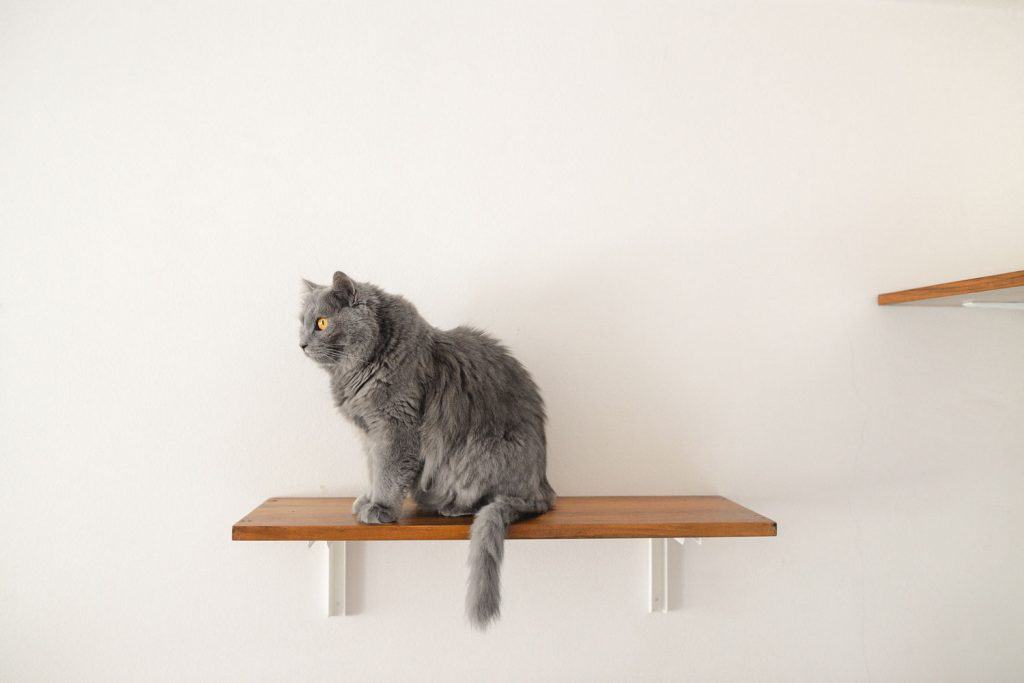
- At least 2 L-brackets
- Wall anchors or wall screws
- Any measuring tool for determining the distance of each shelf
- A screwdriver and a drill
- A carpet cloth, should you choose to decorate the shelves
- Wood stapler
Usually, you can buy pre-made cat shelves in pets stores. They come in different designs, workable sizes, and the necessary mounting hardware.
But be extra attentive with the size of the wooden board. It should be large enough to accommodate the body of your cat. Having said that, we recommend that you first measure your cat's body size to help you get the right board for the shelf.
Although cats are agile and can withstand falling due to their flexibility, you still have to ensure that you lessen the chances of this from happening. So choose an L-bracket sturdy enough to bear the weight of your cat.
The recommended length of the L-bracket is half the depth of the shelf. For example, if your cat shelf is 12 inches deep, the L bracket should be around 6 inches.
3. Create and install the actual cat shelf

You can proceed to construct the shelf after finishing all the preparation. But if you plan to cover the cat shelf with carpet, do so before installing it on the wall. Contrary to what others do, we recommend making the first step since it is easier and more efficient that way, instead of being the last.
How do you attach carpet to cat shelves?
To attach the carpet to the shelves, cut your carpet or cloth to be a little wider than the shelves and place it upside down. Press the shelf board on it and start wrapping each side of the board with the wood stapler. Staple each side about 3 or 4 times to ensure stability. Thumb stacks will suffice if you do not have a wood stapler.
Use either a cutter or scissors to clean up the excess carpet. That makes the shelves even cozy for your cat.
How do you install the shelves on the wall?
Now, we will delve into the actual work! Follow the chronological steps below:
1. Mark the area where you will install each of the brackets for the shelves. Use a level to make sure that each pair is aligned.
2. After ensuring each pair is on the same level, start making drill pilot holes on the wall for the wall anchors.
3. Place the L-brackets on the wall, ensuring that you match the hole in the wall.
4. Individually insert the wall anchors into the pilot drill holes first. This way, the screw can have a firm grip on the wall later on. It will also help stabilize the cat shelf despite repeated jumping of your cat.
5. Slowly insert the screw into the wall anchor until it is fully attached to the wall. Repeat the same process with the other L-brackets.
6. Once all L brackets are installed, mount the shelves one by one from beneath. Only use small screws, so nothing pokes to the other side of the board. And you can now let your furball enjoy her new elevated resting place.
How Deep Should A Cat Shelf Be?
There are differing opinions regarding the depth of cat shelves. But according to CatScapes, a company that specializes in creating nature-like cat shelves, 7.5 inches depth is already sufficient for your cat to jump and rest well on.
You can also opt for 11.25 inches depth when you want your cat to have enough space to sprawl. But remember using this depth means that you have to make sure that the L brackets are at half of that depth to prevent imbalance and premature dislocation from the wall.
You might wonder if you should make the depth equal for all the shelves. Well, you do not have to. It is even encouraged to vary the depths because some of them can only function as stairs your cat can use to climb up and down.
Are Cat Shelves Worth It?

As you might have already realized, installing a cat shelf will take a lot of work, money, and compromises on interior design aspects. So you might be having second thoughts about making one for your feline companion.
The good news is that cat shelves are worth all the trouble and effort. Cat shelves help your cat stay fit because constant climbing helps burn energy, which prevents your cat from becoming obese, not to mention as an escape route against activities or people that they might consider a threat.
In addition, these shelves help your cats satisfy their instinct to explore and establish a territory for themselves.
Aside from cat shelves, playing with your cat at night also makes them active. So, engage with your furball every night. Read this previous post to know how long your night playtime should be with your cat.
Want to provide your little fellow cat trees instead of floating cat shelves? Look into this other article to know where to place them: Where To Place A Cat Tree
To Wrap Up
Cat shelves or perches allow your cat to explore their natural climbing abilities and fulfill their solitary nature. Most importantly, your cat can have a crash pad they can call their own.
So start to consider making a cat shelf now with the step-by-step guide in this blog.
Some elements on this page may have been created by our team using advanced AI to provide you with top-notch cat inspired ideas. Read more about our AI Content Policy.
